
PALUNORA / PALWORLD
Item guide
Materials, recipes and crafting facilities.
 AI CoreMaterialsRecipe available
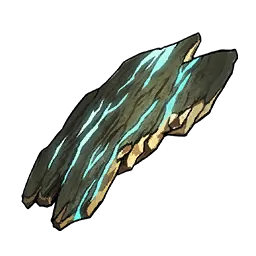 Ancient BarkMaterialsAcquisition details
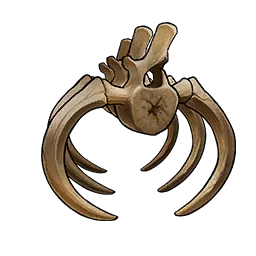 Ancient BoneMaterialsAcquisition details
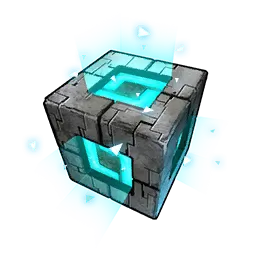 Ancient Civilization CoreMaterialsAcquisition details
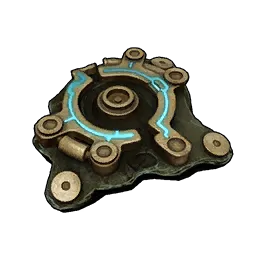 Ancient Civilization PartsMaterialsAcquisition details
 Ancient LavaMaterialsAcquisition details
 Ancient Pal ManuscriptMaterialsAcquisition details
 Aquatic Pal FluidsMaterialsAcquisition details
 Battle TicketMaterialsAcquisition details
 Beautiful FlowerMaterialsAcquisition details
 Berry SeedsMaterialsAcquisition details
 Bio BatteryMaterialsRecipe available
 BoneMaterialsAcquisition details
 Carbon FiberMaterialsRecipe available
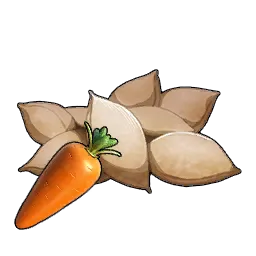 Carrot SeedsMaterialsAcquisition details
 Carrying Lotus (L)MaterialsAcquisition details
 Carrying Lotus (S)MaterialsAcquisition details
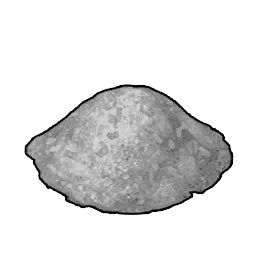 CementMaterialsRecipe available
 Champion's EmblemMaterialsAcquisition details
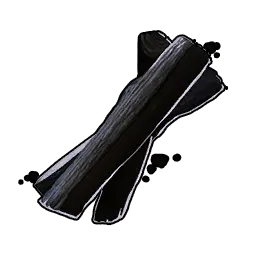 CharcoalMaterialsRecipe available
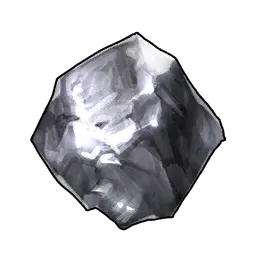 ChromiteMaterialsAcquisition details
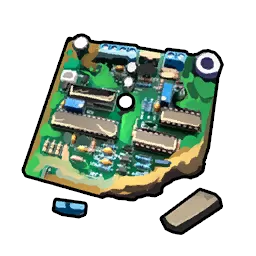 Circuit BoardMaterialsRecipe available
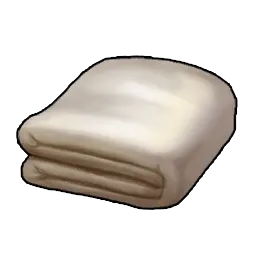 ClothMaterialsRecipe available
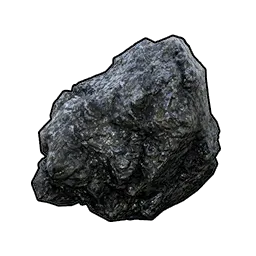 CoalMaterialsAcquisition details
 Common EggMaterialsAcquisition details
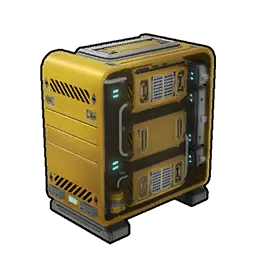 ComputerMaterialsRecipe available
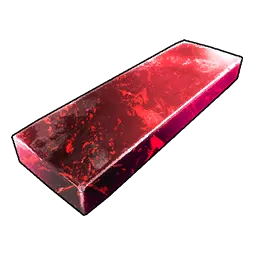 Coralum IngotMaterialsRecipe available
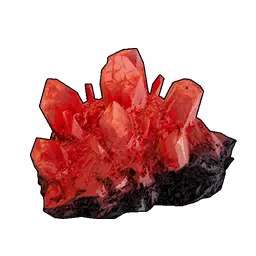 Coralum OreMaterialsAcquisition details
 Corrosive SolventMaterialsRecipe available
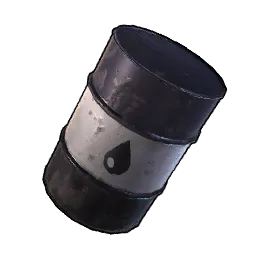 Crude OilMaterialsAcquisition details
 Cryogenic CoolantMaterialsRecipe available
 Damp EggMaterialsAcquisition details
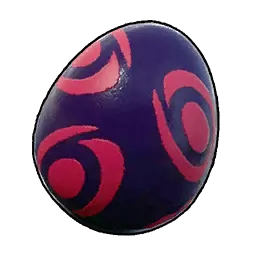 Dark EggMaterialsAcquisition details
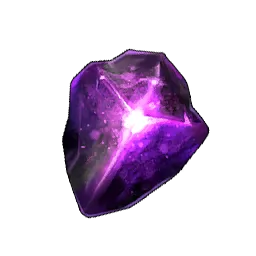 Dark FragmentMaterialsAcquisition details
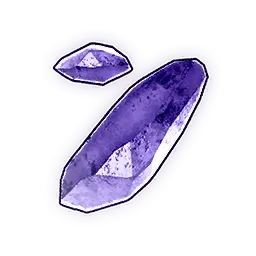 Dark Radiant GemMaterialsAcquisition details
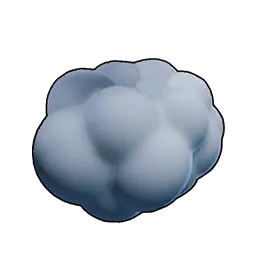 Dazzi CloudMaterialsAcquisition details
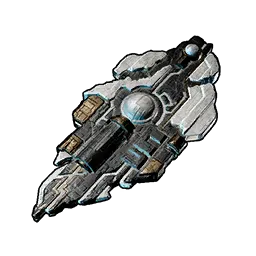 Decayed Ancient RelicMaterialsAcquisition details
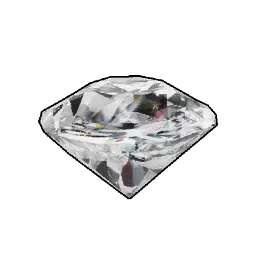 DiamondMaterialsAcquisition details
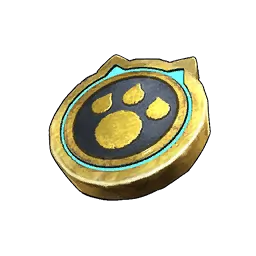 Dog CoinMaterialsAcquisition details
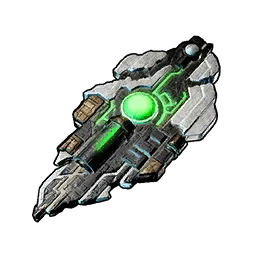 Dormant Ancient RelicMaterialsAcquisition details
No matching items. Clear the filters or try another name.
Data source: PalDB v1.0.5 · Checked: 24.09.2026. Game updates may change recipes. Unlisted rates and conditions are not estimated.
All item pages (1,837)
- AI Core
- Ancient Bark
- Ancient Bone
- Ancient Civilization Core
- Ancient Civilization Parts
- Ancient Lava
- Ancient Pal Manuscript
- Aquatic Pal Fluids
- Battle Ticket
- Beautiful Flower
- Berry Seeds
- Bio Battery
- Bone
- Carbon Fiber
- Carrot Seeds
- Carrying Lotus (L)
- Carrying Lotus (S)
- Cement
- Champion's Emblem
- Charcoal
- Chromite
- Circuit Board
- Cloth
- Coal
- Common Egg
- Computer
- Coralum Ingot
- Coralum Ore
- Corrosive Solvent
- Crude Oil
- Cryogenic Coolant
- Damp Egg
- Dark Egg
- Dark Fragment
- Dark Radiant Gem
- Dazzi Cloud
- Decayed Ancient Relic
- Diamond
- Dog Coin
- Dormant Ancient Relic
- Dragon Egg
- Dragon Radiant Gem
- Dung
- Electric Egg
- Electric Organ
- Electric Radiant Gem
- Emerald
- Explosion-Resistant Fiber
- Fiber
- Fire Radiant Gem
- Flame Organ
- Frozen Egg
- Giant Pal Soul
- Glistening Ancient Relic
- Glowing Ancient Relic
- Gold Coin
- Gorgeous Ancient Relic
- Grass Radiant Gem
- Ground Radiant Gem
- Gumoss Leaf
- Gunpowder
- Hallowed Bar
- Hardwood
- Hexolite
- Hexolite Quartz
- High Quality Cloth
- High Quality Pal Oil
- High Quality Wooden Board
- Horn
- Huge Common Egg
- Huge Damp Egg
- Huge Dark Egg
- Huge Dragon Egg
- Huge Dung
- Huge Electric Egg
- Huge Frozen Egg
- Huge Mutated Egg
- Huge Ominous Egg
- Huge Rocky Egg
- Huge Scorching Egg
- Huge Verdant Egg
- Ice Organ
- Ice Radiant Gem
- Ingot
- Katress Hair
- Killamari Tentacle
- Large Common Egg
- Large Damp Egg
- Large Dark Egg
- Large Dragon Egg
- Large Electric Egg
- Large Frozen Egg
- Large Mutated Egg
- Large Ominous Egg
- Large Pal Soul
- Large Rocky Egg
- Large Scorching Egg
- Large Verdant Egg
- Leather
- Leezpunk Crest
- Lettuce Seeds
- Life Lotus (L)
- Life Lotus (S)
- Luminite Bar
- Medium Pal Soul
- Meteorite Fragment
- Mutated Egg
- Mythical Wood
- Mythical Wooden Board
- Nail
- Neutral Radiant Gem
- Nightstar Sand
- Ominous Egg
- Onion Seeds
- Ore
- Pal Metal Ingot
- Paldium Chunk
- Paldium Fragment
- Paloxite
- Paloxite Ingot
- Penking Plume
- Plasteel
- Polymer
- Potato Seeds
- Power Lotus (L)
- Power Lotus (S)
- Precious Claw
- Precious Dragon Stone
- Precious Entrails
- Precious Pelt
- Precious Plume
- Predator Core
- Pure Quartz
- Refined Ingot
- Ribbuny Ribbon
- Rocky Egg
- Ruby
- Sapphire
- Scorching Egg
- Scrapped Tissue Sample
- Small Pal Soul
- Soralite
- Soralite Ingot
- Speed Lotus (L)
- Speed Lotus (S)
- Stamina Lotus (L)
- Stamina Lotus (S)
- Stone
- Successful Bounty Token
- Sulfur
- Swee Hair
- Thermal Core
- Tocotoco Feather
- Tomato Seeds
- Toxin Filtering Membrane
- Venom Gland
- Verdant Egg
- Water Radiant Gem
- Wheat Seeds
- Wood
- Wooden Board
- Wool
- YakushimaParts001
- YakushimaParts002
- YakushimaParts003
- Baked Berries
- Baked Mushroom
- BLT
- Bolognese Sauce
- Bread
- Broiled Dumud
- Broncherry Fried Noodles
- Broncherry Meat
- Broncherry Rib Roast
- Cake
- Caprity Meat
- Caramel Cotton Candy
- Carbonara
- Carrot
- Cavern Mushroom
- Cheeseburger
- Chikipi Poultry
- Chikipi Sauté
- Cotton Candy
- Dumud Chowder
- Egg
- Eikthyrdeer Loco Moco
- Eikthyrdeer Stew
- Eikthyrdeer Venison
- Extravagant Vegetable Cake
- Flour
- French Fries
- Fried Chikipi
- Fried Egg
- Fried Gloopie Balls
- Fried Kelpsea
- Galeclaw Nikujaga
- Galeclaw Poultry
- Gloopie Tentacle
- Gratin
- Grilled Chikipi
- Grilled Galeclaw
- Grilled Kelpsea
- Grilled Lamball
- Grilled Meat
- Hamburger
- Herb Roasted Caprity
- Herb Roasted Lamball
- Honey
- Hot Dog
- Hot Milk
- Jam-Filled Bun
- Jelliette Bell Flesh
- Jelliette's Jiggly Jelly
- Jellroy Bell Flesh
- Jellroy's Jolly Jelly
- Lamball Kebab
- Lamball Mutton
- Lettuce
- Mammorest Curry
- Mammorest Meat
- Mammorest Steak
- Marinated Mushrooms
- Milk
- Minestrone
- Mozzarina Cheeseburger
- Mozzarina Hamburger
- Mozzarina Meat
- Mozzarina Steak
- Munchill Meat
- Munchill Steak
- Mushroom
- Mushroom Cake
- Mushroom Quiche
- Mushroom Soup
- Mushroom Stew
- Mysterious Mushroom
- Omelet
- Onion
- Pancake
- Pizza
- Potato
- Raw Dumud
- Raw Kelpsea
- Raw Meat
- Red Berries
- Reindrix Stew
- Reindrix Venison
- Roast Eikthyrdeer
- Roast Reindrix
- Roast Rushoar
- Rushoar Bacon 'n' Eggs
- Rushoar Gyoza
- Rushoar Hot Dog
- Rushoar Pork
- Salad
- Salt-Grilled Skutlass
- Seafood Pasta
- Seafood Salad
- Skutlass Sashimi
- Special Cake
- Spring Rolls
- Stewed Galeclaw
- Stir-Fried Vegetables
- Stir-Fried Veggies
- Tomato
- Vegetable Cake
- Wheat
- Ancient Sphere
- Exotic Sphere
- Giga Sphere
- Hyper Sphere
- Legendary Sphere
- Mega Sphere
- Pal Sphere
- Radar Sphere
- Sol Sphere
- Ultimate Sphere
- Ultra Sphere
- Advanced Arrow
- Arrow
- Assault Rifle Ammo
- Beam Launcher Ammo
- Beam Scatter Ammo
- Boost Gun Ammo
- Charge Rifle Ammo
- Coarse Ammo
- Combat SMG Ammo
- Decal Ink
- Energy Cartridge
- Energy Shotgun Ammo
- Fire Arrow
- Flamethrower Fuel
- Gatling Gun Ammo
- Grenade Ammo
- Handgun Ammo
- Heavy Assault Rifle Ammo
- Laser Gatling Cartridge
- Machine Gun Ammo
- Magnum Ammo
- Mechanical Bow Ammo
- Meteorite Ammo
- Missile Ammo
- Overheat Rifle Ammo
- Plasma Cartridge
- Plasma Rifle Ammo
- Poison Arrow
- Prototype Shotgun Ammo
- Reinforced Arrow
- Rifle Ammo
- Rocket Ammo
- Shotgun Shell
- Sunreach Rapid-Fire Ammo
- Sunreach Single-Shot Ammo
- Tactical Grenade Launcher Ammo
- Advanced Bow
- Advanced Fishing Rod (Depresso)
- Advanced Fishing Rod (Pengullet)
- Assault Rifle
- Ballistic Shield
- Bat
- Beam Launcher
- Beam Scatter
- Beam Sword
- Beegarde's Spear
- Beginner Fishing Rod (Chillet)
- Beginner Fishing Rod (Gumoss)
- Boost Gun
- Charge Rifle
- Combat SMG
- Compound Bow
- Core Eject Shotgun
- Crossbow
- Dark Grenade
- Decal Gun 1
- Decal Gun 2
- Decal Gun 3
- Decal Gun 4
- Decal Gun 5
- Double-Barreled Shotgun
- Dragon Grenade
- Drone Launcher
- Elizabee's Staff
- Energy Shotgun
- Enhanced Lily's Spear
- Excalibur
- Fire Arrow Crossbow
- Fire Bow
- FishingRod_Test
- Five Shot Bow
- Flamethrower
- Frag Grenade
- Frag Grenade Mk2
- Gatling Gun
- Giga Grappling Gun
- Grappling Gun
- Grass Grenade
- Grenade Launcher
- Ground Grenade
- Guided Missile Launcher
- Hand-Held Torch
- Handgun
- Heavy Assault Rifle
- Homing Sphere Launcher
- Hyper Grappling Gun
- Ice Grenade
- Incendiary Grenade
- Intermediate Fishing Rod (Cattiva)
- Intermediate Fishing Rod (Croajiro)
- Katana
- Laser Gatling Gun
- Laser Rifle
- Laser Sword
- Legendary Meowmere
- Lily's Spear
- Makeshift Assault Rifle
- Makeshift Handgun
- Makeshift Shotgun
- Makeshift SMG
- Marksman Revolver
- Meat Cleaver
- Mechanical Bow
- Mega Grappling Gun
- Megaboost Gun
- Meowmere
- Metal Axe
- Metal Bat
- Metal Detector
- Metal Pickaxe
- Metal Spear
- Meteor Launcher
- Multi Guided Missile Launcher
- Musket
- Nightglow
- Old Bow
- Old Revolver
- Overheat Rifle
- Pal Metal Axe
- Pal Metal Pickaxe
- Pal Recovery Grenade
- PalDopingShot_3
- Plasma Cannon
- Plasma Multicutter
- Plasma Rifle
- Poison Arrow Crossbow
- Poison Bow
- Primitive Sword
- Prototype Shotgun
- Pump-Action Shotgun
- Refined Metal Axe
- Refined Metal Pickaxe
- Refined Metal Spear
- Rocket Launcher
- Scatter Sphere Launcher
- Semi-Auto Rifle
- Semi-Auto Shotgun
- Shock Grenade
- Single-Shot Rifle
- Single-Shot Sphere Launcher
- SMG
- Stone Axe
- Stone Pickaxe
- Stone Spear
- Stun Baton
- Sword
- Tactical Grenade Launcher
- Terra Blade
- Terraprisma
- Three Shot Bow
- Ultra Grappling Gun
- Vortex Beater
- Water Grenade
- Wooden Club
- Advanced Shield
- Ancient Armor
- Ancient Helm
- Ancient Shield
- Auri Hat
- Axel Hat
- Bjorn Hat
- Bowler Hat
- Cattiva Hat
- Cawgnito Hat
- Chikipi Cap
- Cloth Outfit
- Cold Resistant Hexolite Armor
- Cold Resistant Metal Armor
- Cold Resistant Pal Metal Armor
- Cold Resistant Pelt Armor
- Cold Resistant Plasteel Armor
- Cold Resistant Refined Metal Armor
- Cold-Resistant Ancient Armor
- Common Shield
- Croajiro Cap
- Crown of Salvation
- Dandilord Hat
- Dazzi Hat
- Depresso Armor
- Depresso Helmet
- Dumud Helm
- Explorer Cap
- Eye of Cthulhu Mask
- Farming Hat
- Feathered Hair Band
- Ghangler Accessory
- Giga Shield
- Gloopie Hat
- Golden Crown
- Graduation Cap
- Grinning Tocotoco Cap
- Gumoss Cap
- Hallowed Headgear
- Hallowed Helmet
- Hallowed Hood
- Hallowed Mask
- Hallowed Plate Mail
- Heat Resistant Hexolite Armor
- Heat Resistant Metal Armor
- Heat Resistant Pal Metal Armor
- Heat Resistant Pelt Armor
- Heat Resistant Plasteel Armor
- Heat Resistant Refined Metal Armor
- Heat-Resistant Ancient Armor
- Helmet
- Herbil Headband
- Hexolite Armor
- Hexolite Helmet
- Horns of Supremacy
- Hyper Shield
- Icelyn Hat
- Jelliette Hat
- Katress Cap
- Killamari Cap
- Kingpaca Headband
- Lamball Helm
- Leezpunk Hood
- Lightweight Ancient Armor
- Lightweight Hexolite Armor
- Lightweight Plasteel Armor
- Lily Hat
- Long-Eared Headband
- Lyleen Accessory
- Marcus Hat
- Mega Shield
- Metal Armor
- Metal Helm
- Monarch's Crown
- Moon Lord Mask
- Pal Metal Armor
- Pal Metal Helm
- Pelt Armor
- Penking Cap
- Plasteel Armor
- Plasteel Helmet
- Refined Metal Armor
- Refined Metal Helm
- Ribbuny Headband
- Saya Hat
- Shroomer Hat
- Sibelyx Hat
- Silk Hat
- Soft Hat
- Splatterina Hat
- Swee Cap
- Tarantriss Hat
- Tocotoco Cap
- Tricorne
- Tropical Outfit
- Tundra Outfit
- Turtacle Cap
- Ultra Shield
- V1 Armor
- V2 Armor
- Victor Hat
- Witch Hat
- Witch's Crown
- Xenolord's head
- Zenara Hat
- Zoe Hat
- Ability Glasses
- Air Dash Boots
- Air Walker EX
- Air Walker Mk I
- Air Walker Mk II
- Air Walker Mk III
- Anti-Gravity Belt
- Anubis's Talisman
- Attack Pendant
- Attack Support Whistle
- Blazamut's Talisman
- Blazehowl Ring
- Celestial Emperor's Baton
- Corrosive Mist Mask
- Cryolinx Ring
- Dark Support Whistle
- Defense Pendant
- Defense Support Whistle
- Divine Dragon's Baton
- Dogen Emblem
- Double Air Dash Boots
- Double Jump Boots
- Dragon Support Whistle
- Earth Emperor's Baton
- Electric Support Whistle
- Elphidran Ring
- Explosion-Resistant Undershirt
- Faleris Aqua Ring
- Faleris Ring
- Fenglope Lux Ring
- Fire Support Whistle
- Flame Emperor's Baton
- Frostallion's Talisman
- Grass Support Whistle
- Ground Support Whistle
- Growth Acceleration Bell
- Hartalis's Talisman
- Heat Resistant Undershirt
- Ice Emperor's Baton
- Ice Support Whistle
- Islander's Tool Belt
- Jetragon's Talisman
- Katress Ring
- Life Pendant
- Lord of Lightning's Baton
- Lord of the Sea's Baton
- Lord of the Underworld's Baton
- Lyleen Noct's Talisman
- Lyleen's Talisman
- Menasting Terra Ring
- Multiclimate Undershirt
- Neptilius's Talisman
- Neutral Support Whistle
- Orserk's Talisman
- Otomo_MoveSpeed_up_1
- Pal Tamer's Glasses
- Pendant of Diligence
- Phantom Ring
- Quadruple Jump Boots
- Reptyro Charm
- Ring of Dark Resistance
- Ring of Dragon Resistance
- Ring of Electric Resistance
- Ring of Fire Resistance
- Ring of Freight
- Ring of Grass Resistance
- Ring of Ground Resistance
- Ring of Ice Resistance
- Ring of Mercy
- Ring of Neutral Resistance
- Ring of Trust
- Ring of Water Resistance
- Silvegis Emblem
- Spirit Emperor's Baton
- Thermal Undershirt
- Triple Air Dash Boots
- Triple Jump Boots
- Vaelet Ring
- Vanguard Charm
- Wandering Merchant Charm
- Warsect Terra's Belt
- Water Support Whistle
- Wumpo Charm
- Advanced Recovery Meds
- Advanced Technical Manual
- Alluring Bait
- Ancient Technical Manual
- Applied Cooling Handbook I
- Applied Gathering Handbook I
- Applied Generating Electricity Handbook I
- Applied Handiwork Handbook I
- Applied Kindling Handbook I
- Applied Lumbering Handbook I
- Applied Medicine Production Handbook I
- Applied Mining Handbook I
- Applied Planting Handbook I
- Applied Ranching Handbook I
- Applied Transporting Handbook I
- Applied Watering Handbook I
- Beginner Bait
- Bellanoir Libero (Ultra) Slab
- Bellanoir Libero's Slab
- Bellanoir's Slab
- Blazamut Ryu (Ultra) Slab
- Blazamut Ryu Slab
- Breeder's Precious Pal
- Building Repair Kit
- Burden Elixir
- Burden Remedy
- Celestial Sigil
- Celestial Sigil [Master]
- Copper Key
- Dark Awakening Crystal
- Dark Skill Fruit: Apocalypse
- Dark Skill Fruit: Dark Arrow
- Dark Skill Fruit: Dark Cannon
- Dark Skill Fruit: Dark Laser
- Dark Skill Fruit: Dark Shot
- Dark Skill Fruit: Dark Whisp
- Dark Skill Fruit: Nightmare Ball
- Dark Skill Fruit: Poison Blast
- Dark Skill Fruit: Poison Shower
- Dark Skill Fruit: Psycho Gravity
- Dark Skill Fruit: Shadow Burst
- Dark Skill Fruit: Spirit Flame
- Dark Skill Fruit: Umbral Surge
- Deluxe Bait
- Disposable Implant: Babysitter
- Disposable Implant: Demon God
- Disposable Implant: Demon’s Hand
- Disposable Implant: Diamond Body
- Disposable Implant: Dimensional Leap
- Disposable Implant: Eternal Engine
- Disposable Implant: Eternal Flame
- Disposable Implant: God of Destruction
- Disposable Implant: Heart of the Immovable King
- Disposable Implant: Heavily Armored
- Disposable Implant: Hermit Sage
- Disposable Implant: Idiosyncratic
- Disposable Implant: Immortality
- Disposable Implant: Invader
- Disposable Implant: King of the Waves
- Disposable Implant: Legend
- Disposable Implant: Lucky
- Disposable Implant: Lunker
- Disposable Implant: Mastery of Fasting
- Disposable Implant: Remarkable Craftsmanship
- Disposable Implant: Sanctified Meat Shield
- Disposable Implant: Savior
- Disposable Implant: Siren of the Void
- Disposable Implant: Sky Strider
- Disposable Implant: Swift
- Disposable Implant: Twin-Edged Holy Blade
- Disposable Implant: Vampiric
- Disposable Implant: World Tree's Bounty
- Dragon Awakening Crystal
- Dragon Skill Fruit: Beam Slicer
- Dragon Skill Fruit: Blast Cannon
- Dragon Skill Fruit: Charge Cannon
- Dragon Skill Fruit: Comet Strike
- Dragon Skill Fruit: Dragon Breath
- Dragon Skill Fruit: Dragon Burst
- Dragon Skill Fruit: Dragon Cannon
- Dragon Skill Fruit: Dragon Meteor
- Electric Awakening Crystal
- Electric Skill Fruit: Electric Ball
- Electric Skill Fruit: Lightning Bolt
- Electric Skill Fruit: Lightning Streak
- Electric Skill Fruit: Lightning Strike
- Electric Skill Fruit: Lock-on Laser
- Electric Skill Fruit: Plasma Funnel
- Electric Skill Fruit: Shockwave
- Electric Skill Fruit: Spark Blast
- Electric Skill Fruit: Thunder Rain
- Electric Skill Fruit: Thunder Spear
- Electric Skill Fruit: Thunderstorm
- Electric Skill Fruit: Tri-Lightning
- Electric Skill Fruit: TriSpark
- Farmer's Special Dish
- Fire Awakening Crystal
- Fire Skill Fruit: Fire Ball
- Fire Skill Fruit: Flame Funnel
- Fire Skill Fruit: Flame Wall
- Fire Skill Fruit: Flare Arrow
- Fire Skill Fruit: Flare Storm
- Fire Skill Fruit: Ignis Blast
- Fire Skill Fruit: Ignis Breath
- Fire Skill Fruit: Ignis Rage
- Fire Skill Fruit: Spirit Fire
- Fire Skill Fruit: Volcanic Rain
- Fishing Magnet
- Futuristic Technical Manual
- Gold Key
- Grass Awakening Crystal
- Grass Skill Fruit: Circle Vine
- Grass Skill Fruit: Crosswind
- Grass Skill Fruit: Grass Tornado
- Grass Skill Fruit: Multicutter
- Grass Skill Fruit: Reflect Leaf
- Grass Skill Fruit: Seed Machine Gun
- Grass Skill Fruit: Seed Mine
- Grass Skill Fruit: Solar Blast
- Grass Skill Fruit: Spine Vine
- Grass Skill Fruit: Wind Blast
- Grass Skill Fruit: Wind Cutter
- Ground Awakening Crystal
- Ground Skill Fruit: Bog Blast
- Ground Skill Fruit: Rock Lance
- Ground Skill Fruit: Rockburst
- Ground Skill Fruit: Rocky Impact
- Ground Skill Fruit: Sand Tornado
- Ground Skill Fruit: Sand Twister
- Ground Skill Fruit: Stone Blast
- Ground Skill Fruit: Stone Cannon
- Hartalis (Ultra) Slab
- Hartalis Slab
- High Grade Medical Supplies
- High Quality Bait
- High Quality Recovery Meds
- Homeward Thundercloud
- Ice Awakening Crystal
- Ice Skill Fruit: Absolute Frost
- Ice Skill Fruit: Blizzard Spike
- Ice Skill Fruit: Crystal Breath
- Ice Skill Fruit: Diamond Rain
- Ice Skill Fruit: Freeze Wall
- Ice Skill Fruit: Ice Missile
- Ice Skill Fruit: Iceberg
- Ice Skill Fruit: Icicle Bullet
- Ice Skill Fruit: Icicle Cutter
- Ice Skill Fruit: Icicle Line
- Innovative Technical Manual
- Kinship Peach
- Life Crystal
- Life Fruit
- Little Kinship Peach
- Low Grade Medical Supplies
- Low Quality Recovery Meds
- Lucky Bait
- Medical Supplies
- Memory Wiping Medicine
- Might Elixir
- Might Remedy
- Mind Control Meds
- Mysterious Mushroom Juice
- Neutral Awakening Crystal
- Nutrient Tonic
- Pal Reverser
- PalAwakening_Test
- PalGenderReverseTest
- PalPassiveSkillChange_SwimSpeed_ConsumeTest
- Power Fruit
- Powerful Fishing Magnet
- Quick Bait
- Recovery Meds
- Revival Potion
- Ripe Starfruit
- Risky Bait
- Silver Key
- Simple Bait
- Skill Fruit: Air Blade
- Skill Fruit: Air Cannon
- Skill Fruit: Holy Burst
- Skill Fruit: Implode
- Skill Fruit: Pal Blast
- Skill Fruit: Power Bomb
- Skill Fruit: Power Shot
- Speed Elixir
- Speed Remedy
- Stamina Elixir
- Stamina Remedy
- Starfruit ☆1
- Starfruit ☆2
- Starfruit ☆3
- Starfruit ☆4
- Stout Fruit
- Strange Juice
- Summoning Altar
- Suspicious Juice
- Sweet Bait
- Thunder Skill Fruit: All Range Thunder
- Training Crystal
- Training Manual (L)
- Training Manual (M)
- Training Manual (S)
- Training Manual (XL)
- Treasure Map
- Vital Elixir
- Vital Remedy
- Water Awakening Crystal
- Water Skill Fruit: Acid Rain
- Water Skill Fruit: Aqua Burst
- Water Skill Fruit: Aqua Gun
- Water Skill Fruit: Aqua Surge
- Water Skill Fruit: Bubble Blast
- Water Skill Fruit: Curtain Splash
- Water Skill Fruit: Geyser Gush
- Water Skill Fruit: Hydro Jet
- Water Skill Fruit: Hydro Laser
- Water Skill Fruit: Hydro Slicer
- Water Skill Fruit: Splash
- Water Skill Fruit: Torrential Blast
- Wing Cell
- World Tree Holy Water
- Xenolord (Ultra) Slab
- Xenolord Slab
- Zoe's Halloween Costume
- Zoe's Tattered Memento
- Giga Glider
- Glider_Legendary
- Hyper Glider
- Mega Glider
- Normal Parachute
- PV_Glider_Manta
- Wing Pack
- WingGlider_Test
- Curve Module
- Heavy Weight Module
- Homing Module
- Slider Module
- Sniper Module
- Sniper Module II
- TEST_CaptureItemModifier
- Advanced Medicine Workbench
- Advanced Sphere Assembly Line
- Advanced Weapon Assembly Line
- Advanced Workshop
- Ancient Farm
- Ancient Furnace
- Ancient Kitchen
- Ancient Material Synthesizer
- Ancient Relic Recycler
- Ancient Workbench
- Berry Plantation
- Campfire
- Carrot Plantation
- Coal Mine
- Cooking Pot
- Crude Oil Extractor
- Crusher
- Drafting Table
- Electric Furnace
- Electric Kitchen
- Electric Medicine Workbench
- Fishing Pond
- Gigantic Furnace
- Gold Coin Assembly Line
- Hexolite Quartz Mine
- High Quality Workbench
- High-Pressure Crude Oil Extractor
- Improved Furnace
- Large Fishing Pond
- Large-Scale Stone Oven
- Lettuce Plantation
- Logging Site
- Logging Site II
- Medieval Medicine Workbench
- Mill
- Onion Plantation
- Ore Mining Site
- Ore Mining Site II
- Pal Gear Workbench
- Potato Plantation
- Primitive Furnace
- Primitive Workbench
- Production Assembly Line
- Production Assembly Line II
- Pure Quartz Quarry
- Ranch
- Refrigerated Crusher
- Repair Bench
- Soralite Quarry
- Sphere Assembly Line
- Sphere Assembly Line II
- Sphere Workbench
- Stone Pit
- Sulfur Mine
- Tomato Plantation
- Weapon Assembly Line
- Weapon Assembly Line II
- Weapon Workbench
- Wheat Plantation
- Aegidron Bounty Token
- Aegidron Saddle
- Anubis Bounty Token
- Aquatic Construction Kit
- Arsox Bounty Token
- Arsox Saddle
- Astegon Bounty Token
- Astegon Saddle
- Average Feed Bag
- Azurmane Bounty Token
- Azurmane Saddle
- Azurobe Bounty Token
- Azurobe Cryst Saddle
- Azurobe Saddle
- Bastigor's Hammer
- Beakon Bounty Token
- Beakon Cryst Saddle
- Beakon Saddle
- Blazamut Bounty Token
- Blazamut Ryu Saddle
- Blazamut Saddle
- Blazehowl Bounty Token
- Blazehowl Noct Saddle
- Blazehowl Saddle
- Braloha Saddle
- Broncherry Aqua Bounty Token
- Broncherry Aqua Saddle
- Broncherry Bounty Token
- Broncherry Saddle
- Bulldosu Saddle
- Bushi Bounty Token
- Caprity Noct Bounty Token
- Cattiva Effigy
- Celaray Lux's Gloves
- Celaray's Gloves
- Celesdir Bounty Token
- Celesdir Noct Bounty Token
- Celesdir Noct Saddle
- Celesdir Saddle
- Chillet Bounty Token
- Chillet Ignis Saddle
- Chillet Saddle
- Cryolinx Terra Bounty Token
- Daedream's Necklace
- Dandilord's Petal
- Dazemu Saddle
- Dazzi Noct Bounty Token
- Dazzi Noct's Necklace
- Dazzi's Necklace
- Depresso Effigy
- Digtoise's Headband
- Dinossom Lux Bounty Token
- Dinossom Lux Saddle
- Dinossom Saddle
- Direhowl's Saddled Harness
- Dualith Bounty Token
- Dualith Noct Bounty Token
- Dualith Noct Saddle
- Dualith Saddle
- Dumud Bounty Token
- Dynamoff Bounty Token
- Dynamoff Saddle
- Echoing Flute
- Eidrolon Bounty Token
- Eidrolon Ignis Saddle
- Eidrolon Saddle
- Eikthyrdeer Saddle
- Eikthyrdeer Terra Saddle
- Elizabee Bounty Token
- Elphidran Aqua Saddle
- Elphidran Bounty Token
- Elphidran Saddle
- Enhanced Hip Lantern
- Extra Weapon Holster
- Extra Weapon Holster 2
- Faded Schematic
- Faleris Aqua Bounty Token
- Faleris Aqua Saddle
- Faleris Saddle
- Felbat Bounty Token
- Fenglope Bounty Token
- Fenglope Lux Bounty Token
- Fenglope Lux Saddle
- Fenglope Saddle
- Flaracle Bounty Token
- Flopie's Necklace
- Foxcicle Bounty Token
- Foxparks Cryst Bounty Token
- Foxparks Cryst's Harness
- Foxparks' Harness
- Frostallion Bounty Token
- Frostallion Noct Bounty Token
- Frostallion Noct Saddle
- Frostallion Saddle
- Galeclaw's Gloves
- Ghangler Ignis Saddle
- Ghangler Saddle
- Giant Feed Bag
- Giant Pouch
- Gildane Bounty Token
- Gildane Saddle
- Grintale Bounty Token
- Grintale Saddle
- Grizzbolt Bounty Token
- Grizzbolt's Minigun
- Gumoss Bounty Token
- Hangyu Cryst's Glove
- Hangyu's Gloves
- Hartalis Saddle
- Helzephyr Lux Saddle
- Helzephyr Saddle
- Herbil Effigy
- Herbil's Harness
- Hip Lantern
- Huge Feed Bag
- Implant: Ace Swimmer
- Implant: Artisan
- Implant: Brave
- Implant: Burly Body
- Implant: Dainty Eater
- Implant: Demon God
- Implant: Diamond Body
- Implant: Diet Lover
- Implant: Eternal Engine
- Implant: Ferocious
- Implant: Fine Furs
- Implant: Fit as a Fiddle
- Implant: Hard Skin
- Implant: Healing Coach
- Implant: Heart of the Immovable King
- Implant: Impatient
- Implant: Infinite Stamina
- Implant: Insomnia
- Implant: Logging Foreman
- Implant: Mastery of Fasting
- Implant: Mercy Hit
- Implant: Mine Foreman
- Implant: Motivational Leader
- Implant: Musclehead
- Implant: Nimble
- Implant: Noble
- Implant: Philanthropist
- Implant: Positive Thinker
- Implant: Reload Master
- Implant: Remarkable Craftsmanship
- Implant: Runner
- Implant: Serenity
- Implant: Serious
- Implant: Sleek Stroke
- Implant: Stronghold Strategist
- Implant: Swift
- Implant: Vanguard
- Implant: Wellness Watcher
- Implant: Work Slave
- Implant: Workaholic
- Jetragon Bounty Token
- Jetragon's Missile Launcher
- Jolthog Cryst's Gloves
- Jolthog's Gloves
- Jormuntide Bounty Token
- Jormuntide Ignis Saddle
- Jormuntide Saddle
- Katress Bounty Token
- Key Sphere of Envy
- Key Sphere of Gluttony
- Key Sphere of Greed
- Key Sphere of Lust
- Key Sphere of Original Sin
- Key Sphere of Pride
- Key Sphere of Sloth
- Key Sphere of Wrath
- Killamari Primo's Gloves
- Killamari's Gloves
- Kingpaca Bounty Token
- Kingpaca Cryst Bounty Token
- Kingpaca Cryst Saddle
- Kingpaca Saddle
- Kitsun Noct Bounty Token
- Kitsun Noct Saddle
- Kitsun Saddle
- Knocklem Bounty Token
- Lamball Effigy
- Large Feed Bag
- Large Pouch
- Lifmunk Effigy
- Lifmunk's Submachine Gun
- Lockpicking Tool v1
- Lockpicking Tool v2
- Lockpicking Tool v3
- Loupmoon Cryst Bounty Token
- Lunaris Bounty Token
- Lunaris Effigy
- Lyleen Bounty Token
- Lyleen Noct Bounty Token
- Mammorest Bounty Token
- Mammorest Cryst Saddle
- Mammorest Saddle
- Maraith Saddle
- Marine Echobone
- Medium Pouch
- Melpaca Saddle
- Menasting Bounty Token
- Menasting Terra Bounty Token
- Mimog Effigy
- Modified Pal's Contaminated Core
- Moldron Bounty Token
- Moldron Cryst Bounty Token
- Moldron Cryst Saddle
- Moldron Saddle
- Mossanda Lux Bounty Token
- Mossanda Lux's Grenade Launcher
- Mossanda's Grenade Launcher
- Munchill Effigy
- Mycora Bounty Token
- Mysterious Accessory Box
- Mystic Accessory Box
- Necromus Saddle
- Needoll Bounty Token
- Neptilius Bounty Token
- Neptilius Saddle
- Nitemary Bounty Token
- Nitewing Bounty Token
- Nitewing Saddle
- Nyafia Bounty Token
- Nyafia's Shotgun
- Omascul Bounty Token
- Ophydia Bounty Token
- Ophydia Saddle
- Paladius Saddle
- PalPassiveSkillChangeTest
- PalPassiveSkillChangeTest2
- Palumba Saddle
- Pengullet Effigy
- Pengullet Lux's Rocket Launcher
- Pengullet Rocket Launcher
- Penking Bounty Token
- Petallia Bounty Token
- Pierdon Bounty Token
- Pierdon Cryst Bounty Token
- Polapup Saddle
- Polapup Terra Saddle
- Prixter Lux Bounty Token
- Prunelia Bounty Token
- Pyrin Bounty Token
- Pyrin Noct Saddle
- Pyrin Saddle
- Quivern Botan Saddle
- Quivern Bounty Token
- Quivern Saddle
- Ragnahawk Saddle
- Rayhound Cryst Saddle
- Rayhound Saddle
- Reindrix Saddle
- Relaxaurus Effigy
- Relaxaurus Lux Bounty Token
- Relaxaurus Lux's Missile Launcher
- Relaxaurus' Missile Launcher
- Renjishi Bounty Token
- Reptyro Bounty Token
- Reptyro Cryst Saddle
- Reptyro Saddle
- Ribbuny Botan Bounty Token
- Rooby Effigy
- Roujay Saddle
- Rushoar Saddle
- Seafoam Echobone
- Selyne Saddle
- Shadowbeak Saddle
- Shaolong Saddle
- Shroomer Noct Saddle
- Shroomer Saddle
- Sibelyx Bounty Token
- Silent Echobone
- Silvance's Plume
- Silvegis Bounty Token
- Silvegis Saddle
- Slowatt Bounty Token
- Small Feed Bag
- Small Pouch
- Smokie Bounty Token
- Smokie Cryst's Harness
- Smokie's Harness
- Snock Bounty Token
- Solmora Lux Saddle
- Solmora Saddle
- Splatterina Bounty Token
- Starryon Bounty Token
- Starryon Primo Saddle
- Starryon Saddle
- Surfent Saddle
- Surfent Terra Saddle
- Suzaku Aqua Saddle
- Suzaku Bounty Token
- Suzaku Saddle
- Sweepa Bounty Token
- Sweepa Saddle
- Tanzee Effigy
- Tanzee Ignis's Assault Rifle
- Tanzee's Assault Rifle
- Tarantris Bounty Token
- Tarantriss Saddle
- TEST_BossDefeatReward
- Tetroise Bounty Token
- Tetroise Primo Bounty Token
- Tetroise Primo Saddle
- Tetroise Saddle
- Tidewind Echobone
- Tocotoco's Gloves
- Twin Knights Bounty Token
- Univolt Bounty Token
- Univolt Cryst Saddle
- Univolt Saddle
- Vaelet Bounty Token
- Vanwyrm Cryst Saddle
- Vanwyrm Saddle
- Verdash Bounty Token
- Warsect Bounty Token
- Warsect Terra Bounty Token
- Whalaska Bounty Token
- Whalaska Ignis Bounty Token
- Whalaska Ignis Saddle
- Whalaska Saddle
- Wistella Bounty Token
- Wixen Bounty Token
- Wumpo Botan Bounty Token
- Wumpo Botan Saddle
- Wumpo Saddle
- Xenogard Saddle
- Xenolord Saddle
- Yakumo Effigy
- Yakumo Saddle
- Advanced Bow Schematic 1
- Advanced Bow Schematic 2
- Advanced Bow Schematic 3
- Advanced Bow Schematic 4
- Advanced Fishing Rod (Depresso) Schematic
- Air Walker EX Schematic
- Air Walker Mk I Schematic
- Air Walker Mk II Schematic
- Air Walker Mk III Schematic
- Ancient Armor Schematic 1
- Ancient Armor Schematic 2
- Ancient Armor Schematic 3
- Ancient Armor Schematic 4
- Ancient Helm Schematic 1
- Ancient Helm Schematic 2
- Ancient Helm Schematic 3
- Ancient Helm Schematic 4
- Anubis's Talisman Schematic
- Assault Rifle Schematic 1
- Assault Rifle Schematic 2
- Assault Rifle Schematic 3
- Assault Rifle Schematic 4
- Attack Pendant Schematic
- Attack Support Whistle Schematic
- Beam Launcher Schematic 1
- Beam Launcher Schematic 2
- Beam Launcher Schematic 3
- Beam Launcher Schematic 4
- Beam Scatter Schematic 1
- Beam Scatter Schematic 2
- Beam Scatter Schematic 3
- Beam Scatter Schematic 4
- Beam Sword Schematic 1
- Beam Sword Schematic 2
- Beam Sword Schematic 3
- Beam Sword Schematic 4
- Beginner Fishing Rod (Gumoss) Schematic
- Bellanoir Libero (Ultra) Slab Fragment
- Bellanoir Libero's Slab Fragment
- Bellanoir's Slab Fragment
- Blazamut Ryu (Ultra) Slab Fragment
- Blazamut Ryu Slab Fragment
- Blazamut's Talisman Schematic
- Blazehowl Ring Schematic
- Blueprint_HeadEquip025_5
- Blueprint_HeadEquip026_5
- Blueprint_HeadEquip028_5
- Blueprint_HeadEquip031_5
- Blueprint_HeadEquip032_5
- Blueprint_Otomo_PalConfidence_Increase_1
- Blueprint_Salvage_FishingBait_1_A
- Blueprint_Salvage_FishingBait_1_B
- Blueprint_Salvage_FishingBait_2_A
- Blueprint_Salvage_FishingBait_2_B
- Blueprint_Salvage_FishingBait_3_B
- Blueprint_Salvage_TreasureBoxKey01
- BlueprintTest
- Bowler Hat Schematic 1
- Bowler Hat Schematic 2
- Bowler Hat Schematic 3
- Bowler Hat Schematic 4
- Celestial Emperor's Baton Schematic
- Celestial Sigil Schematic
- Ceremonial Candlestick Schematic
- Charge Rifle Schematic 1
- Charge Rifle Schematic 2
- Charge Rifle Schematic 3
- Charge Rifle Schematic 4
- Cloth Outfit Schematic 1
- Cloth Outfit Schematic 2
- Cloth Outfit Schematic 3
- Cloth Outfit Schematic 4
- Cold Resistant Hexolite Armor Schematic 1
- Cold Resistant Hexolite Armor Schematic 2
- Cold Resistant Hexolite Armor Schematic 3
- Cold Resistant Hexolite Armor Schematic 4
- Cold Resistant Metal Armor Schematic 1
- Cold Resistant Metal Armor Schematic 2
- Cold Resistant Metal Armor Schematic 3
- Cold Resistant Metal Armor Schematic 4
- Cold Resistant Pal Metal Armor Schematic 1
- Cold Resistant Pal Metal Armor Schematic 2
- Cold Resistant Pal Metal Armor Schematic 3
- Cold Resistant Pal Metal Armor Schematic 4
- Cold Resistant Pelt Armor Schematic 1
- Cold Resistant Pelt Armor Schematic 2
- Cold Resistant Pelt Armor Schematic 3
- Cold Resistant Pelt Armor Schematic 4
- Cold Resistant Plasteel Armor Schematic 1
- Cold Resistant Plasteel Armor Schematic 2
- Cold Resistant Plasteel Armor Schematic 3
- Cold Resistant Plasteel Armor Schematic 4
- Cold Resistant Refined Metal Armor Schematic 1
- Cold Resistant Refined Metal Armor Schematic 2
- Cold Resistant Refined Metal Armor Schematic 3
- Cold Resistant Refined Metal Armor Schematic 4
- Cold-Resistant Ancient Armor Schematic 1
- Cold-Resistant Ancient Armor Schematic 2
- Cold-Resistant Ancient Armor Schematic 3
- Cold-Resistant Ancient Armor Schematic 4
- Combat SMG Schematic 1
- Combat SMG Schematic 2
- Combat SMG Schematic 3
- Combat SMG Schematic 4
- Compound Bow Schematic 1
- Compound Bow Schematic 2
- Compound Bow Schematic 3
- Compound Bow Schematic 4
- Core Eject Shotgun Schematic 1
- Core Eject Shotgun Schematic 2
- Core Eject Shotgun Schematic 3
- Core Eject Shotgun Schematic 4
- Crossbow Schematic 1
- Crossbow Schematic 2
- Crossbow Schematic 3
- Crossbow Schematic 4
- Cryolinx Ring Schematic
- Dark Support Whistle Schematic
- Dazzi Hat Schematic 1
- Dazzi Hat Schematic 2
- Dazzi Hat Schematic 3
- Dazzi Hat Schematic 4
- Defense Pendant Schematic
- Defense Support Whistle Schematic
- Divine Dragon's Baton Schematic
- Dogen Emblem Schematic
- Double-Barreled Shotgun Schematic 1
- Double-Barreled Shotgun Schematic 2
- Double-Barreled Shotgun Schematic 3
- Double-Barreled Shotgun Schematic 4
- Dragon Support Whistle Schematic
- Drone Launcher Schematic 1
- Drone Launcher Schematic 2
- Drone Launcher Schematic 3
- Drone Launcher Schematic 4
- Earth Emperor's Baton Schematic
- Electric Support Whistle Schematic
- Elphidran Ring Schematic
- Energy Shotgun Schematic 1
- Energy Shotgun Schematic 2
- Energy Shotgun Schematic 3
- Energy Shotgun Schematic 4
- Enhanced Lily's Spear Schematic 4
- Excalibur Schematic
- Excalibur Schematic 1
- Excalibur Schematic 2
- Excalibur Schematic 3
- Excalibur Schematic 4
- Exploration Cap Schematic 1
- Exploration Cap Schematic 2
- Exploration Cap Schematic 3
- Exploration Cap Schematic 4
- Faleris Aqua Ring Schematic
- Faleris Ring Schematic
- Farming Hat Schematic 1
- Farming Hat Schematic 2
- Farming Hat Schematic 3
- Farming Hat Schematic 4
- Feathered Hair Band Schematic 1
- Feathered Hair Band Schematic 2
- Feathered Hair Band Schematic 3
- Feathered Hair Band Schematic 4
- Fenglope Lux Ring Schematic
- Fire Arrow Crossbow Schematic 1
- Fire Arrow Crossbow Schematic 2
- Fire Arrow Crossbow Schematic 3
- Fire Arrow Crossbow Schematic 4
- Fire Support Whistle Schematic
- Flame Emperor's Baton Schematic
- Flamethrower Schematic 1
- Flamethrower Schematic 2
- Flamethrower Schematic 3
- Flamethrower Schematic 4
- Free Pal Alliance Banner Schematic
- Free Pal Alliance Flag Schematic
- Frostallion's Talisman Schematic
- Gatling Gun Schematic 1
- Gatling Gun Schematic 2
- Gatling Gun Schematic 3
- Gatling Gun Schematic 4
- Golden Crown Schematic 1
- Golden Crown Schematic 2
- Golden Crown Schematic 3
- Golden Crown Schematic 4
- Graduation Cap Schematic 1
- Graduation Cap Schematic 2
- Graduation Cap Schematic 3
- Graduation Cap Schematic 4
- Grass Support Whistle Schematic
- Grenade Launcher Schematic 1
- Grenade Launcher Schematic 2
- Grenade Launcher Schematic 3
- Grenade Launcher Schematic 4
- Grinning Tocotoco Cap Schematic 1
- Grinning Tocotoco Cap Schematic 2
- Grinning Tocotoco Cap Schematic 3
- Grinning Tocotoco Cap Schematic 4
- Ground Support Whistle Schematic
- Growth Acceleration Bell Schematic
- Guided Missile Launcher Schematic 1
- Guided Missile Launcher Schematic 2
- Guided Missile Launcher Schematic 3
- Guided Missile Launcher Schematic 4
- Gumoss Cap Schematic 1
- Gumoss Cap Schematic 2
- Gumoss Cap Schematic 3
- Gumoss Cap Schematic 4
- Hallowed Headgear Schematic
- Hallowed Headgear Schematic 1
- Hallowed Headgear Schematic 2
- Hallowed Headgear Schematic 3
- Hallowed Headgear Schematic 4
- Hallowed Helmet Schematic
- Hallowed Helmet Schematic 1
- Hallowed Helmet Schematic 2
- Hallowed Helmet Schematic 3
- Hallowed Helmet Schematic 4
- Hallowed Hood Schematic
- Hallowed Hood Schematic 1
- Hallowed Hood Schematic 2
- Hallowed Hood Schematic 3
- Hallowed Hood Schematic 4
- Hallowed Mask Schematic
- Hallowed Mask Schematic 1
- Hallowed Mask Schematic 2
- Hallowed Mask Schematic 3
- Hallowed Mask Schematic 4
- Hallowed Plate Mail Schematic
- Hallowed Plate Mail Schematic 1
- Hallowed Plate Mail Schematic 2
- Hallowed Plate Mail Schematic 3
- Hallowed Plate Mail Schematic 4
- Handgun Schematic 1
- Handgun Schematic 2
- Handgun Schematic 3
- Handgun Schematic 4
- Hartalis (Ultra) Slab Fragment
- Hartalis Slab Fragment
- Hartalis's Talisman Schematic
- Heat Resistant Hexolite Armor Schematic 1
- Heat Resistant Hexolite Armor Schematic 2
- Heat Resistant Hexolite Armor Schematic 3
- Heat Resistant Hexolite Armor Schematic 4
- Heat Resistant Metal Armor Schematic 1
- Heat Resistant Metal Armor Schematic 2
- Heat Resistant Metal Armor Schematic 3
- Heat Resistant Metal Armor Schematic 4
- Heat Resistant Pal Metal Armor Schematic 1
- Heat Resistant Pal Metal Armor Schematic 2
- Heat Resistant Pal Metal Armor Schematic 3
- Heat Resistant Pal Metal Armor Schematic 4
- Heat Resistant Pelt Armor Schematic 1
- Heat Resistant Pelt Armor Schematic 2
- Heat Resistant Pelt Armor Schematic 3
- Heat Resistant Pelt Armor Schematic 4
- Heat Resistant Plasteel Armor Schematic 1
- Heat Resistant Plasteel Armor Schematic 2
- Heat Resistant Plasteel Armor Schematic 3
- Heat Resistant Plasteel Armor Schematic 4
- Heat Resistant Refined Metal Armor Schematic 1
- Heat Resistant Refined Metal Armor Schematic 2
- Heat Resistant Refined Metal Armor Schematic 3
- Heat Resistant Refined Metal Armor Schematic 4
- Heat-Resistant Ancient Armor Schematic 1
- Heat-Resistant Ancient Armor Schematic 2
- Heat-Resistant Ancient Armor Schematic 3
- Heat-Resistant Ancient Armor Schematic 4
- Heat-Resistant Undershirt Schematic
- Heavy Assault Rifle Schematic 1
- Heavy Assault Rifle Schematic 2
- Heavy Assault Rifle Schematic 3
- Heavy Assault Rifle Schematic 4
- Helmet Schematic 1
- Helmet Schematic 2
- Helmet Schematic 3
- Helmet Schematic 4
- Hexolite Armor Schematic 1
- Hexolite Armor Schematic 2
- Hexolite Armor Schematic 3
- Hexolite Armor Schematic 4
- Hexolite Helmet Schematic 1
- Hexolite Helmet Schematic 2
- Hexolite Helmet Schematic 3
- Hexolite Helmet Schematic 4
- Ice Emperor's Baton Schematic
- Ice Support Whistle Schematic
- Intermediate Fishing Rod (Croajiro) Schematic
- Islander's Tool Belt Schematic
- Jetragon's Talisman Schematic
- Katana Schematic 1
- Katana Schematic 2
- Katana Schematic 3
- Katana Schematic 4
- Katress Cap Schematic 1
- Katress Cap Schematic 2
- Katress Cap Schematic 3
- Katress Cap Schematic 4
- Katress Ring Schematic
- Killamari Cap Schematic 1
- Killamari Cap Schematic 2
- Killamari Cap Schematic 3
- Killamari Cap Schematic 4
- Laboratory Chair Schematic
- Laboratory Desk Schematic
- Laser Gatling Gun Schematic 1
- Laser Gatling Gun Schematic 2
- Laser Gatling Gun Schematic 3
- Laser Gatling Gun Schematic 4
- Laser Rifle Schematic 1
- Laser Rifle Schematic 2
- Laser Rifle Schematic 3
- Laser Rifle Schematic 4
- Laser Sword Schematic 1
- Laser Sword Schematic 2
- Laser Sword Schematic 3
- Laser Sword Schematic 4
- Leezpunk Hood Schematic 1
- Leezpunk Hood Schematic 2
- Leezpunk Hood Schematic 3
- Leezpunk Hood Schematic 4
- Life Pendant Schematic
- Lightweight Ancient Armor Schematic 1
- Lightweight Ancient Armor Schematic 2
- Lightweight Ancient Armor Schematic 3
- Lightweight Ancient Armor Schematic 4
- Lightweight Hexolite Armor Schematic 1
- Lightweight Hexolite Armor Schematic 2
- Lightweight Hexolite Armor Schematic 3
- Lightweight Hexolite Armor Schematic 4
- Lightweight Plasteel Armor Schematic 1
- Lightweight Plasteel Armor Schematic 2
- Lightweight Plasteel Armor Schematic 3
- Lightweight Plasteel Armor Schematic 4
- Lily's Spear Schematic 4
- Long-Eared Headband Schematic 1
- Long-Eared Headband Schematic 2
- Long-Eared Headband Schematic 3
- Long-Eared Headband Schematic 4
- Lord of Lightning's Baton Schematic
- Lord of the Sea's Baton Schematic
- Lord of the Underworld's Baton Schematic
- Lyleen Noct's Talisman Schematic
- Lyleen Statue Schematic
- Lyleen's Talisman Schematic
- Majestic Candlestick Schematic
- Majestic Wall Torch Schematic
- Makeshift Assault Rifle Schematic 1
- Makeshift Assault Rifle Schematic 2
- Makeshift Assault Rifle Schematic 3
- Makeshift Assault Rifle Schematic 4
- Makeshift Handgun Schematic 1
- Makeshift Handgun Schematic 2
- Makeshift Handgun Schematic 3
- Makeshift Handgun Schematic 4
- Makeshift Shotgun Schematic 1
- Makeshift Shotgun Schematic 2
- Makeshift Shotgun Schematic 3
- Makeshift Shotgun Schematic 4
- Makeshift SMG Schematic 1
- Makeshift SMG Schematic 2
- Makeshift SMG Schematic 3
- Makeshift SMG Schematic 4
- Marksman Revolver Schematic 1
- Marksman Revolver Schematic 2
- Marksman Revolver Schematic 3
- Marksman Revolver Schematic 4
- Mechanical Bow Schematic 1
- Mechanical Bow Schematic 2
- Mechanical Bow Schematic 3
- Mechanical Bow Schematic 4
- Menasting Terra Ring Schematic
- Metal Armor Schematic 1
- Metal Armor Schematic 2
- Metal Armor Schematic 3
- Metal Armor Schematic 4
- Metal Bat Schematic 1
- Metal Bat Schematic 2
- Metal Bat Schematic 3
- Metal Bat Schematic 4
- Metal Helm Schematic 1
- Metal Helm Schematic 2
- Metal Helm Schematic 3
- Metal Helm Schematic 4
- Meteor Launcher Schematic 4
- Monarch's Crown Schematic 1
- Monarch's Crown Schematic 2
- Monarch's Crown Schematic 3
- Monarch's Crown Schematic 4
- Moon Lord Statue Schematic
- Multi Guided Missile Launcher Schematic
- Multi Guided Missile Launcher Schematic 1
- Multi Guided Missile Launcher Schematic 2
- Multi Guided Missile Launcher Schematic 3
- Multi Guided Missile Launcher Schematic 4
- Multiclimate Undershirt Schematic
- Musket Schematic 1
- Musket Schematic 2
- Musket Schematic 3
- Musket Schematic 4
- Neptilius's Talisman Schematic
- Neutral Support Whistle Schematic
- Nightglow Schematic
- Nightglow Schematic 1
- Nightglow Schematic 2
- Nightglow Schematic 3
- Nightglow Schematic 4
- Old Bow Schematic 1
- Old Bow Schematic 2
- Old Bow Schematic 3
- Old Bow Schematic 4
- Old Revolver Schematic 1
- Old Revolver Schematic 2
- Old Revolver Schematic 3
- Old Revolver Schematic 4
- Orserk's Talisman Schematic
- Overheat Rifle Schematic 1
- Overheat Rifle Schematic 2
- Overheat Rifle Schematic 3
- Overheat Rifle Schematic 4
- Pal Metal Armor Schematic 1
- Pal Metal Armor Schematic 2
- Pal Metal Armor Schematic 3
- Pal Metal Armor Schematic 4
- Pal Metal Helm Schematic 1
- Pal Metal Helm Schematic 2
- Pal Metal Helm Schematic 3
- Pal Metal Helm Schematic 4
- Pal Tamer's Glasses Schematic
- Paper Lantern Schematic
- Pelt Armor Schematic 1
- Pelt Armor Schematic 2
- Pelt Armor Schematic 3
- Pelt Armor Schematic 4
- Pendant of Diligence Schematic
- Penking Cap Schematic 1
- Penking Cap Schematic 2
- Penking Cap Schematic 3
- Penking Cap Schematic 4
- Phantom Ring Schematic
- Plasma Cannon Schematic 1
- Plasma Cannon Schematic 2
- Plasma Cannon Schematic 3
- Plasma Cannon Schematic 4
- Plasma Rifle Schematic 1
- Plasma Rifle Schematic 2
- Plasma Rifle Schematic 3
- Plasma Rifle Schematic 4
- Plasteel Armor Schematic 1
- Plasteel Armor Schematic 2
- Plasteel Armor Schematic 3
- Plasteel Armor Schematic 4
- Plasteel Helmet Schematic 1
- Plasteel Helmet Schematic 2
- Plasteel Helmet Schematic 3
- Plasteel Helmet Schematic 4
- Poison Arrow Crossbow Schematic 1
- Poison Arrow Crossbow Schematic 2
- Poison Arrow Crossbow Schematic 3
- Poison Arrow Crossbow Schematic 4
- Prototype Shotgun Schematic 1
- Prototype Shotgun Schematic 2
- Prototype Shotgun Schematic 3
- Prototype Shotgun Schematic 4
- Pump-Action Shotgun Schematic 1
- Pump-Action Shotgun Schematic 2
- Pump-Action Shotgun Schematic 3
- Pump-Action Shotgun Schematic 4
- Rayne Syndicate Flag Schematic
- Red Wooden Lantern Schematic
- Refined Metal Armor Schematic 1
- Refined Metal Armor Schematic 2
- Refined Metal Armor Schematic 3
- Refined Metal Armor Schematic 4
- Refined Metal Helm Schematic 1
- Refined Metal Helm Schematic 2
- Refined Metal Helm Schematic 3
- Refined Metal Helm Schematic 4
- Reptyro Charm Schematic
- Ribbuny Headband Schematic 1
- Ribbuny Headband Schematic 2
- Ribbuny Headband Schematic 3
- Ribbuny Headband Schematic 4
- Ring of Dark Resistance Schematic
- Ring of Dragon Resistance Schematic
- Ring of Electric Resistance Schematic
- Ring of Fire Resistance Schematic
- Ring of Freight Schematic
- Ring of Grass Resistance Schematic
- Ring of Ground Resistance Schematic
- Ring of Ice Resistance Schematic
- Ring of Neutral Resistance Schematic
- Ring of Trust Schematic
- Ring of Water Resistance Schematic
- Rocket Launcher Schematic 1
- Rocket Launcher Schematic 2
- Rocket Launcher Schematic 3
- Rocket Launcher Schematic 4
- Semi-Auto Rifle Schematic 1
- Semi-Auto Rifle Schematic 2
- Semi-Auto Rifle Schematic 3
- Semi-Auto Rifle Schematic 4
- Semi-Auto Shotgun Schematic 1
- Semi-Auto Shotgun Schematic 2
- Semi-Auto Shotgun Schematic 3
- Semi-Auto Shotgun Schematic 4
- Silk Hat Schematic 1
- Silk Hat Schematic 2
- Silk Hat Schematic 3
- Silk Hat Schematic 4
- Silvegis Emblem Schematic
- Single-Shot Rifle Schematic 1
- Single-Shot Rifle Schematic 2
- Single-Shot Rifle Schematic 3
- Single-Shot Rifle Schematic 4
- SMG Schematic 1
- SMG Schematic 2
- SMG Schematic 3
- SMG Schematic 4
- Soft Hat Schematic 1
- Soft Hat Schematic 2
- Soft Hat Schematic 3
- Soft Hat Schematic 4
- Spirit Emperor's Baton Schematic
- Swee Cap Schematic 1
- Swee Cap Schematic 2
- Swee Cap Schematic 3
- Swee Cap Schematic 4
- Sword Schematic 1
- Sword Schematic 2
- Sword Schematic 3
- Sword Schematic 4
- Tactical Grenade Launcher Schematic 1
- Tactical Grenade Launcher Schematic 2
- Tactical Grenade Launcher Schematic 3
- Tactical Grenade Launcher Schematic 4
- Terra Blade Schematic
- Terra Blade Schematic 1
- Terra Blade Schematic 2
- Terra Blade Schematic 3
- Terra Blade Schematic 4
- Terraprisma Schematic
- Terraprisma Schematic 1
- Terraprisma Schematic 2
- Terraprisma Schematic 3
- Terraprisma Schematic 4
- Thermal Undershirt Schematic
- Tocotoco Cap Schematic 1
- Tocotoco Cap Schematic 2
- Tocotoco Cap Schematic 3
- Tocotoco Cap Schematic 4
- Tricorne Schematic 1
- Tricorne Schematic 2
- Tricorne Schematic 3
- Tricorne Schematic 4
- Tropical Outfit Schematic 1
- Tropical Outfit Schematic 2
- Tropical Outfit Schematic 3
- Tropical Outfit Schematic 4
- Tundra Outfit Schematic 1
- Tundra Outfit Schematic 2
- Tundra Outfit Schematic 3
- Tundra Outfit Schematic 4
- V1 Armor Schematic 4
- V2 Armor Schematic 4
- Vaelet Ring Schematic
- Vanguard Charm Schematic
- Vortex Beater Schematic
- Vortex Beater Schematic 1
- Vortex Beater Schematic 2
- Vortex Beater Schematic 3
- Vortex Beater Schematic 4
- Wandering Merchant Charm Schematic
- Warsect Terra's Belt Schematic
- Water Support Whistle Schematic
- Wire Fence Schematic
- Witch Hat Schematic 1
- Witch Hat Schematic 2
- Witch Hat Schematic 3
- Witch Hat Schematic 4
- Wooden Barricade Schematic
- Wumpo Charm Schematic
- Xenolord (Ultra) Slab Fragment
- Xenolord Slab Fragment
- Yakumo Statue Schematic
- Zoe's Halloween Costume Schematic